
Views: 0 Author: Site Editor Publish Time: 2026-08-01 Origin: Site


Melt purity directly dictates final part quality in blow molding operations. Compromised filtration leads to structural defects, parison instability, and high scrap rates on the production floor. Clogged screen packs in continuous extrusion and reciprocating blow molding units cause erratic back pressure. This erratic pressure destroys parison control and forces excessive machine downtime during manual changeovers. Operators face a constant battle between maintaining melt homogeneity and keeping the machine running efficiently. Addressing these production bottlenecks requires a rigorous, step-by-step manual replacement procedure. We also need to evaluate automated screen changer upgrades to optimize Overall Equipment Effectiveness (OEE). This guide breaks down the exact mechanical steps for safe screen pack replacement. It covers diagnostic triggers that signal a clogged breaker plate. We will also look at how upgrading your filtration hardware impacts long-term production stability and reduces scrap.
Filtration Dictates Quality: Proper screen pack configuration prevents unmelt, gels, and contamination from disrupting parison formation and causing blow-outs.
Pressure Monitoring is Critical: Spikes or sudden drops in extruder back pressure or motor load are primary indicators that a screen pack replacement or diagnostic check is overdue.
Machine Type Influences Pressure Dynamics: Continuous extrusion units and reciprocating blow molding machines handle screen-generated back pressure differently, requiring specific diagnostic approaches.
Mesh Orientation Matters: Incorrectly layering coarse and fine mesh screens can lead to screen rupture and catastrophic extruder screw or die head damage.
Automation Drives ROI: Upgrading from manual breaker plates to continuous piston screen changers eliminates changeover downtime, specifically for processors using post-consumer recycled (PCR) resins.
The baseline operational requirement for melt filtration in blow molding is to ensure a homogeneous, contaminant-free polymer melt before it enters the die head. The screen pack and breaker plate work together as a single mechanical unit to filter impurities. The breaker plate is a thick steel disc with chamfered holes. It physically supports the wire mesh screens against the massive forward pressure generated by the extruder screw. Beyond simple filtration, this assembly converts the rotational melt flow coming off the screw into a linear flow. This conversion is necessary to prevent spiral memory in the parison, which can cause the extruded tube to twist or warp as it drops.
The screen pack also builds the necessary back pressure to improve melt mixing. Polymer resins require a specific amount of resistance to ensure the mechanical shear from the screw properly melts and homogenizes the plastic pellets. Without adequate back pressure, you risk pumping unmelted resin directly into the die head. This leads to weak spots in the final blown part.
Continuous extrusion systems and reciprocating screw systems handle this back pressure differently. Continuous systems rely on a steady, uninterrupted flow of plastic to form a constant parison drop. The screen pack in a continuous system experiences a relatively stable pressure load. Reciprocating systems, however, accumulate melt in front of the screw and then rapidly push it forward to shoot the parison. The screen pack in a reciprocating system must withstand high cyclic pressure spikes during the shot injection phase. It must also prevent melt backflow when the screw retracts.
Machine Type | Melt Flow Characteristic | Screen Pack Pressure Load | Primary Filtration Challenge |
|---|---|---|---|
Continuous Extrusion | Steady, uninterrupted flow | Stable, gradual increase as screens clog | Maintaining consistent parison weight over long runs |
Reciprocating Screw | Cyclic accumulation and injection | High-pressure spikes during injection phase | Preventing screen rupture under sudden mechanical stress |
Managing back pressure directly impacts parison quality. Insufficient back pressure leads to poor parison swell control. Parison swell occurs when the polymer exits the die and expands. If the pressure behind the die is inconsistent due to a failing screen pack, the swell will vary. This causes unpredictable wall thickness variations in the final product. Proper screen pack resistance ensures consistent extruder back pressure, translating to a stable, repeatable parison drop.
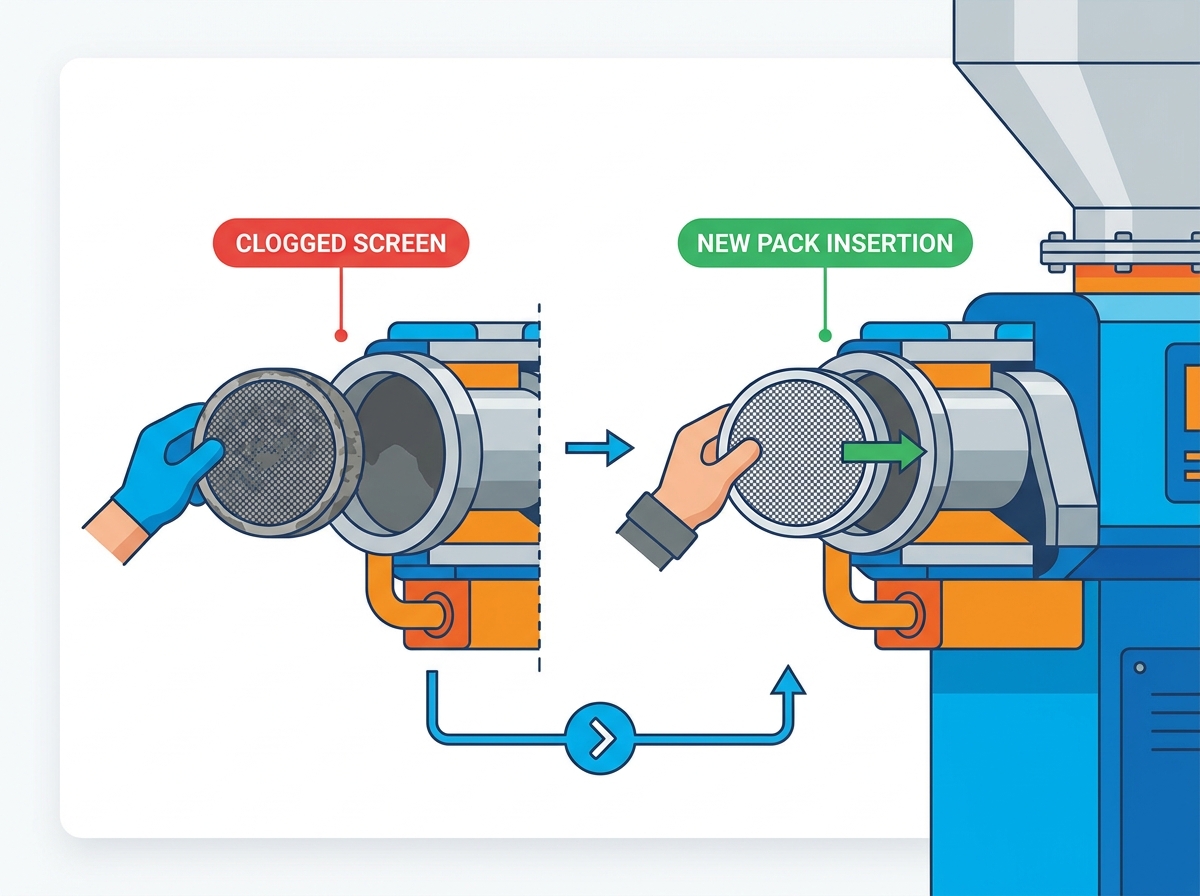
Identifying the physical and mechanical indicators of a failing screen pack prevents catastrophic equipment damage and reduces scrap rates. Operators must monitor both the visual quality of the extrudate and the mechanical feedback from the machine's control panel. Extrudate contamination is the most obvious visual trigger. If you see gels, black specks, or unmelted polymer nodes in the parison or the blown part, the filtration system is compromised. Gels indicate that the melt is not homogenizing properly, often due to insufficient back pressure from a ruptured screen. Black specks are carbonized polymer. They occur when degraded material breaks loose from a clogged screen pack and flows into the die head.
A clogged mesh increases resistance against the extruder screw. This causes measurable spikes in extruder amperage and head pressure gauges. Operators should establish a baseline head pressure for a clean screen pack with a specific resin. When the head pressure climbs 20% to 30% above this baseline, the screen pack is blinding and requires replacement. Ignoring this pressure spike forces the extruder motor to work harder, drawing more amperage and generating excessive shear heat. This excess heat can degrade the polymer before it even reaches the mold.
Severe clogs reduce the overall output rate of the extrusion blow molding machine. If the screw is turning at the same RPM but the parison weight is dropping, the melt is struggling to pass through the breaker plate. This throughput degradation directly impacts cycle times and production quotas.
Differentiating clogged screens from worn extruder screws requires a systematic diagnostic approach. Both issues can cause a drop in throughput, but they present different pressure signatures. A clogged screen pack causes high head pressure and high motor load. A worn extruder screw and barrel assembly causes low head pressure and low motor load, as the melt slips backward over the worn screw flights instead of pushing forward through the die.
Symptom | Head Pressure | Motor Amperage | Likely Root Cause |
|---|---|---|---|
Low throughput, visual gels | High | High | Clogged or blinded screen pack |
Low throughput, inconsistent melt | Low | Low | Worn extruder screw flights or barrel |
Sudden drop in pressure, black specks | Sudden Drop | Normal to Low | Ruptured screen pack (blow-through) |
Performing manual screen changes on industrial blow molders demands strict adherence to safety protocols. The equipment operates at high temperatures and high pressures. A sudden release of trapped polymer melt can cause severe burns. Lockout/tagout (LOTO) procedures are mandatory. Operators must wear appropriate personal protective equipment (PPE), including heat-resistant gauntlet gloves, long sleeves, and full face shields.
Purge the Extruder: Before shutting down the drive motor, purge the extruder to relieve residual head pressure. Run the screw at a low RPM until the parison stops dropping. This ensures the barrel is not holding a pressurized charge of molten plastic.
Execute LOTO: Shut down the main drive motor and apply lockout/tagout devices to the electrical panel. Leave the barrel and die head heaters on to maintain the polymer in a molten state. Cold plastic acts like concrete and will prevent you from opening the breaker plate assembly.
Gain Mechanical Clearance: Depending on the machine design, manually retract the extruder carriage or slide the die unit backward. You need sufficient physical clearance between the end of the barrel and the die head assembly to access the breaker plate.
Open the Assembly: Unbolt the die head flange or swing open the extruder hinge. Loosen the bolts in a star pattern to prevent warping the heated flanges. Use a dedicated breaker bar, not an impact wrench, to avoid damaging the hot threads.
Extract and Clean: Safely extract the spent screen pack and the breaker plate. Use brass scrapers and copper gauze to clean the molten polymer off the breaker plate and the sealing flanges. Never use steel tools. Steel will score the critical sealing surfaces, leading to permanent polymer leaks. Ensure all chamfered holes in the breaker plate are clear of degraded material.
Install the New Pack: Install the new mesh screen pack with the correct layering sequence. Place the coarsest screen (e.g., 20 mesh) directly against the breaker plate for structural support. Place the fine screen (e.g., 100 mesh) in the middle for primary filtration. Place a medium screen (e.g., 40 mesh) facing the screw to catch large contaminants and prevent premature blinding of the fine mesh.
Reassemble and Torque: Reinstall the breaker plate and close the assembly. Apply high-temperature anti-seize compound to the bolt threads. Tighten the bolts in a star pattern to the manufacturer's specified torque.
Heat Soak and Retorque: Allow the assembly to heat soak for 15 to 30 minutes. The new components will expand as they reach operating temperature. After the heat soak, retorque the bolts to ensure a proper seal.
Resume Production: Remove LOTO devices. Start the extruder at a very low RPM. Purge the material through the new screen pack to ensure no leaks exist at the flanges and that all trapped air is pushed out before resuming parison production.
Transitioning from manual maintenance to capital equipment upgrades resolves chronic downtime issues. Manual breaker plate removal incurs significant labor costs. A standard manual changeover can take anywhere from 30 minutes to two hours, depending on the machine size and the stubbornness of the polymer seals. During this time, the machine produces zero parts, and the resin sitting in the heated barrel begins to degrade.
Push-button hydraulic slide plate screen changers eliminate the heavy lifting. These units use a hydraulic cylinder to push a steel slide plate containing two breaker plates. When one screen pack clogs, the operator pushes a button, and the hydraulic ram forces the clean breaker plate into the melt stream while pushing the dirty one out. This swaps the screens in seconds. The operator can then clean the dirty screen pack offline while the machine continues to run. However, slide plate changers still cause a momentary interruption in the melt flow, which can disrupt the parison drop on continuous extrusion machines.
Continuous piston screen changers solve the melt interruption problem. These systems feature dual-piston designs. Each piston holds a breaker plate and screen pack. The melt flow splits and passes through both pistons simultaneously. When a screen needs changing, the operator hydraulically moves one piston out of the housing to an open position. The other piston remains closed and in-line, maintaining continuous melt flow to the die head. Once the dirty screen is replaced, the piston is moved back into the housing, and the process is repeated for the second piston. This allows for zero-downtime production, making it ideal for continuous extrusion blow molding.
Backflush systems represent the highest tier of automated filtration. These systems automatically reverse a portion of the melt flow to self-clean the screens. When pressure sensors detect a clogged screen, the system shifts internal valves to force clean polymer backward through the mesh, blowing the contaminants out through a discharge port. This is a critical evaluation point for facilities processing high volumes of post-consumer recycled (PCR) resins or heavily contaminated regrind. Backflush systems significantly reduce maintenance frequency, minimize operator intervention, and keep the extrusion process stable for weeks at a time.
Selecting the appropriate mesh configuration involves strict operational trade-offs. You must balance the need for a clean melt against the mechanical limitations of your extruder. Finer mesh weaves, such as a 120-mesh or a Dutch twill weave, capture microscopic impurities. This improves part quality, eliminates visual defects, and ensures high-gloss aesthetics on the blown bottles. However, finer mesh accelerates the rate of clogging. It also increases the baseline back pressure on the extruder screw.
Operators must adapt mesh density based on resin variations. When processing virgin, high-density polyethylene (HDPE) with a high melt flow index (low viscosity), you might need a finer mesh simply to generate enough back pressure for proper mixing. Conversely, when processing fractional melt resins or high percentages of regrind, a finer mesh will blind almost immediately. In these cases, operators often switch to a coarser mesh stack (e.g., 20/40/20) to maintain adequate throughput and prevent pressure spikes, accepting a slight reduction in absolute filtration.
Excessive back pressure from overly restrictive or neglected screen packs causes severe mechanical damage. High head pressure forces the extruder screw backward. This places immense stress on the thrust bearings located in the gearbox. Over time, this constant high-pressure load will cause the thrust bearings to fail, requiring a complete gearbox rebuild. Furthermore, high back pressure forces the molten polymer to slip backward over the screw flights. This abrasive action accelerates wear on the screw flights and the barrel lining. Balancing filtration requirements with equipment longevity is essential for keeping maintenance costs under control.
Improper sealing and polymer leaks are the most common risks during manual screen pack replacement. Polymer leaking from the breaker plate flange usually occurs due to improper torqueing sequences or thermal expansion mismatch. If an operator tightens the bolts while the flanges are cold, the metal will expand during production, stretching the bolts and breaking the seal. Mitigate this risk by enforcing strict heat-soak times. Always allow the assembly to reach full operating temperature before applying the final torque wrench sequence.
Screen rupture, often called blow-through, is a catastrophic failure. It happens when unsupported fine screens tear under high pressure. When a screen ruptures, it sends wire mesh fragments and a slug of concentrated contaminants directly into the die head. This can score the polished surfaces of the die tooling, permanently damaging the parison profile. Mitigate blow-through by emphasizing proper coarse-backing support mesh placement. The heavy 20-mesh or 10-mesh screen must always sit directly against the breaker plate to bridge the chamfered holes and support the weaker fine screens.
Thermal degradation during changeovers is a hidden risk that ruins subsequent production runs. If a manual changeover takes too long, the polymer sitting stagnant inside the heated barrel will begin to burn. This degraded material turns into hard black specks. When the machine restarts, these black specks will continuously break loose and contaminate the parison for hours. Efficient changeover procedures minimize this risk. Operators should stage all tools, replacement screens, and cleaning supplies before shutting down the drive motor. If a delay occurs, lower the barrel temperatures to prevent the resin from burning.
Maintaining stable melt filtration is essential for achieving consistent blow molding quality and maximizing production efficiency. A screen pack is not simply a replaceable filter component—it directly influences extruder back pressure, parison stability, melt homogeneity, and the overall reliability of the molding process.
Successful screen pack management requires more than replacing clogged screens when problems appear. Operators must understand the relationship between pressure trends, resin contamination levels, mesh configuration, and machine type to determine the correct maintenance strategy. Proper screen layering, timely replacement, and accurate diagnosis help prevent defects such as gels, black specks, unstable parison formation, and unnecessary extruder wear.
For high-volume production environments, manual screen changes may become a limiting factor in overall equipment effectiveness. Upgrading to an automated screen changer can significantly reduce downtime, maintain continuous melt flow, and improve process stability—especially when processing recycled materials or contaminated resin streams.
At Dawson Plastic, we help manufacturers optimize their extrusion blow molding systems with reliable filtration solutions and equipment recommendations tailored to specific production requirements. By evaluating resin characteristics, machine configuration, pressure conditions, and productivity goals, our team can help identify the most suitable filtration approach for long-term operation.
A: Replacement frequency depends entirely on resin purity and machine operating conditions. Monitor extruder back pressure and motor load constantly. When head pressure climbs 20% to 30% above the clean baseline, the screen pack is blinding and requires immediate replacement to prevent equipment damage.
A: Place the coarse screen directly against the breaker plate for structural support. Place the fine screen in the middle for primary filtration. Place a medium screen facing the extruder screw to catch large contaminants and prevent premature blinding of the fine mesh.
A: A clogged screen pack causes erratic back pressure and inconsistent melt flow. This leads to poor parison swell control, making it impossible for the parison programmer to maintain consistent wall thickness in the final blown part.
A: Reciprocating machines require heavy-duty screen packs that can withstand high cyclic pressure spikes during shot injection and prevent melt backflow. Continuous units require steady, consistent resistance to maintain a constant parison drop without interruption.
A: It is never recommended to clean and reuse fine wire mesh screen packs. The mechanical cleaning process damages the delicate woven wires, leading to compromised filtration, weak spots, and a high probability of screen rupture during production.
A: Continuous screen changers use dual pistons to allow for screen replacement without stopping the melt flow, eliminating downtime. Discontinuous slide plate changers require stopping the extruder momentarily to hydraulically swap the screen pack.
A: Fluctuating back pressure immediately after a screen change indicates trapped air in the die head, improper screen seating against the breaker plate, or an incorrect mesh configuration that fails to provide consistent flow resistance.